Creating New Groups
This procedure describes how to create new groups.
To create new groups:
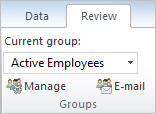
1 Click the Review tab, then click Manage in the Groups section.
The Manage Groups dialog box opens.
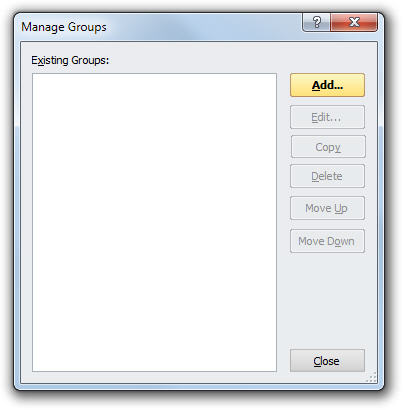
2 Click Add to display the Manage Group Properties dialog box.
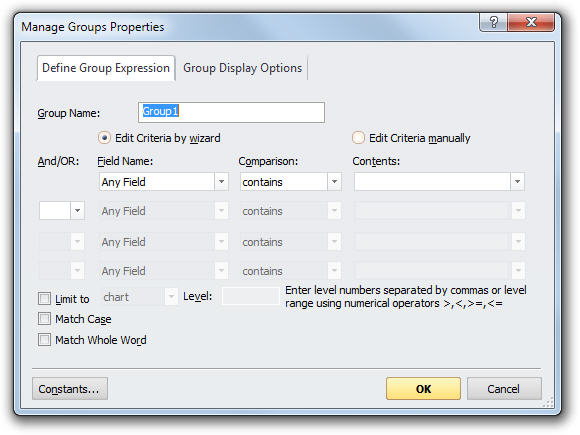
3 Enter the group name in the Group Name field.
4 Enter the group selection criteria. You can use a formula to define a group using the Field Name, Comparison, and Contents fields. For complex formulas use the And/Or operators to expand or contract your criteria. See Using Formulas in Working with Charts: Advanced Charting for more information.
Note: Use the Constants button to include any defined constants in your selection criteria. See Using Constants in Working with Charts: Advanced Charting for more information.
5 Click the Group Display Options tab.
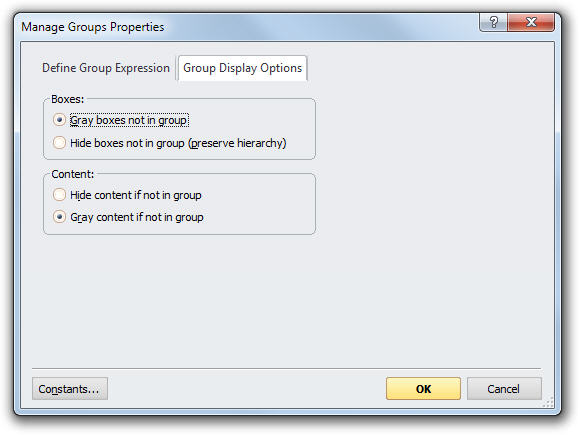
· Define the display options as follows:
· Boxes:
· Gray boxes not in group: Grays the boxes that do not belong to the group.
· Hide boxes not in group (preserve hierarchy): Hides boxes that do not belong to the group unless the box is required to maintain the hierarchy of the chart.
· Content:
· Hide content if not in group: Hides the content of boxes that do not belong to the group.
· Gray content if not in group: Grays the content of boxes that do not belong to the group.
6 Click OK to create the group.
7 Click Close. The Manage Groups dialog box is closed.
Applying Groups
You can apply a group to the displayed chart.
To apply a group:
· Click the Review tab, then use the Current group dropdown to select a group.
The boxes in the chart are redrawn to indicate which boxes belong to the current group.
Note: If you do not want to apply a group, select Groups | All Boxes from the Review tab.
Editing, Copying, Deleting, and Ordering Groups
You may want to edit, delete, or reorder groups.
To edit group settings:
1 Click the Review tab, then click Manage in the Groups section. The Manage Groups dialog box opens, showing all defined groups.
2 Select the group you want to edit and click Edit.
3 Click Close when finished.
To copy a group:
1 Click the Review tab, then click Manage in the Groups section. The Manage Groups dialog box opens, showing all defined groups.
2 Select the group you want to copy and click Copy.
Note: OrgPlus adds your new group to the group list. The default name of your new group is the same as the original you copied, but with an incremental number appended to it. For example, if you copy a report named MyGroup, the default name of your copy is Mygroup1. You can rename groups in the Manage Groups dialog box.
3 Click Close when finished.
To delete groups:
1 From the Manage Groups dialog box, select the required group to be deleted and click Delete. A confirmation dialog box is displayed.
2 Click OK to delete the group.
3 Click Close when finished.
To change the ordering of groups:
1 From the Manage Groups dialog box, select a group and click:
Move Up to move the group up one position in the list.
OR
Move Down to move the group down one position in the list.
2 Click Close when finished.