To access the Search panel:
· Click the View tab and select Search from the Panels section.
Once you open the Search panel, you select which fields and formatting options you want to include in the results.
To specify the search fields and formatting:
1 In the Search panel, click the link Click here to define Search results.
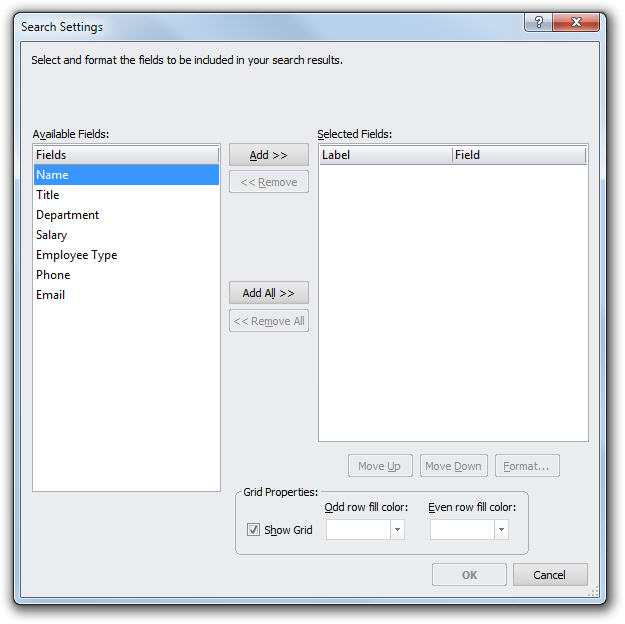
2 In the Search Settings dialog box, select the fields you want to include from the Available Fields list, and click the Add button.
OR
Click the Add All button to move all fields into the Selected Fields column.
Note: You can change the Label for any field by double-clicking it and typing the new label. To revert back to the original label, right-click and choose Use Original Label.
3 Click the Move Up or Move Down buttons to rearrange the order in which the fields appear.
4 Click the Format button to select formatting options for the results. These include the standard Font and Alignment settings.
Note: You can also apply formatting by right-clicking on a label and choosing Format from the popup menu.
5 If you want to highlight odd or even rows using a fill color, select one of these options.
6 To remove the grid pattern that appears by default, deselect Show Grid. The grid includes row and column line separators in the results table.
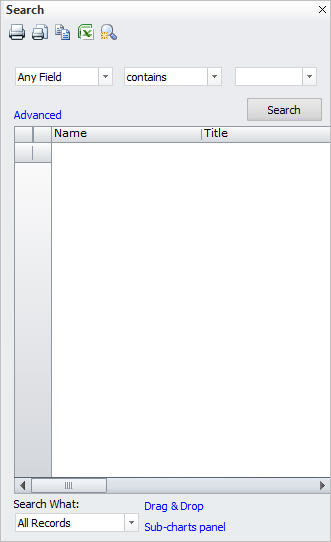
7 Click OK. The default Search panel opens. The Any Field drop-down list includes the fields you selected in the Search Settings dialog box. The second drop-down list includes standard operators. The third drop-down list displays all values available for the field you select.
Note: You can perform an advanced search to specify multiple fields and values as search criteria.
To perform a basic search:
1 In the top part of the Search panel, enter the search criteria by selecting the field, operator, and value you want to search by.
2
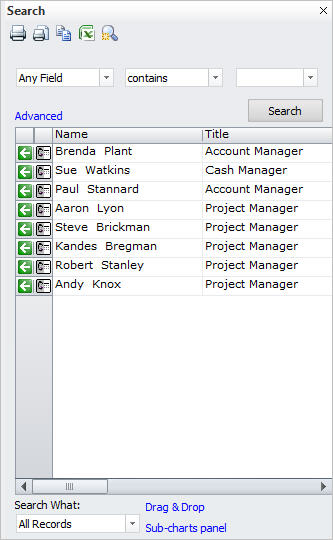
Click the Search button. The records meeting the search
results appear in the panel.
3
To locate a record in the active chart, click the Locate ![]() button next to the name. The box for
that record becomes selected in the chart, as shown in this example.
button next to the name. The box for
that record becomes selected in the chart, as shown in this example.
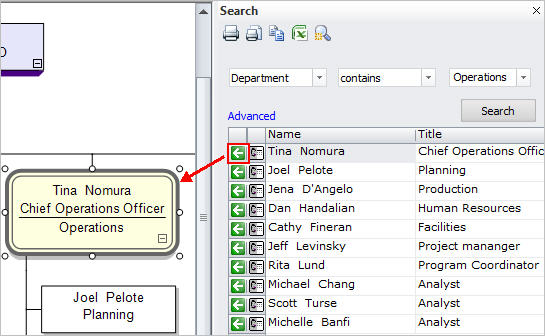
Note: The second icon represents orphan records. A red bar indicates that there is no manager. A yellow bar indicates that the orphan record has a manager. See Orphan Management for more information.
To perform an advanced search:
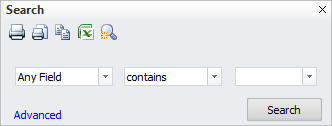
1 With the Search panel open, click the Advanced link.
2 Specify the first search criteria by selecting a field, an operator, and a value.
3 Select and/or and specify the second search criteria by selecting a field, operator, and value. Add third and fourth criteria, if needed.
4 Click Search to display the search results.
5 Click the Basic link to return to the basic search mode.
When performing a search, you can select a sub-set of data to search using the Search What drop-down list. The following options are available:
|
Option |
Description |
|
All Records |
Search the chart and all unassigned records (orphans). |
|
Entire Chart |
Search the entire chart. |
|
Active Sub-chart |
Search only the displayed sub-chart. |
|
Orphans w/ Mgr |
Search for all unassigned records that have a valid supervisor but are not part of the current chart. |
|
Orphans w/o Mgr |
Search for all unassigned records that do not have a valid supervisor are therefore not included in the chart. |
|
All Orphans |
Search all unassigned records. |
You can open, create, and work with sub-charts through the Search panel. You simply click on the Sub-charts panel link that appears below the search results. For more information, see Using the Sub-Charts Panel.