This topic describes how to begin using the Import Wizard and includes the following topics:
Instructions on using the Import Wizard are continued in the following topics:
In this step, you will use the Import Wizard to select a Data Connection file or data source.
To select the data source:
1 Click the File tab and select Import Data. The Select Data Source dialog box is displayed.
2 Select a data connection file (.ora, .ldap, odbc, .sqlsvr, .saphr, .oledb) or a data source file (.xml, .txt, .xls, .xlsx) and click Open.
Note: Depending on the file type selected you may be prompted to login to the data source.
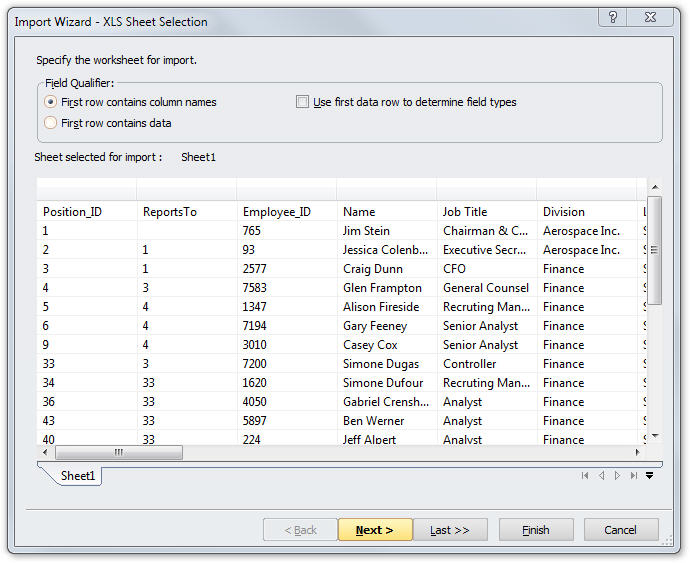
The Import Wizard - XLS Sheet Selection dialog box enables you to select a worksheet from the Excel file and to verify that the worksheet is properly formatted.
To verify that the Excel file is properly formatted:
1 Choose a sheet using the tabs at the bottom of the spreadsheet. The corresponding data is displayed in the dialog box.
2 Verify that the data is properly formatted and ready for import.
If the data is not correct, click Cancel and make any required corrections to the spreadsheet.
3 You can manually specify whether the first row contains data or column headers by selecting the appropriate option:
· First row contains column names
· First row contains data
Note: Selecting the “Use first data row to determine field types” checkbox may increase import performance for larger data sets.
4 Click Next. The Import Wizard - Data Settings dialog box is displayed.
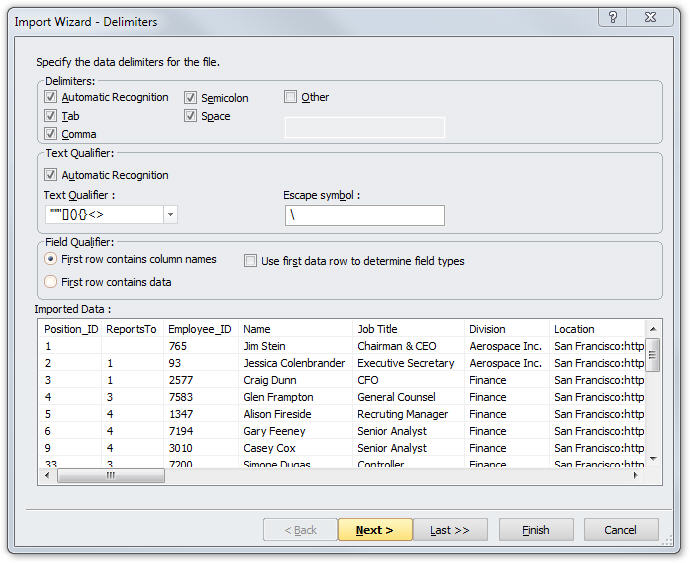
The Import Wizard - Delimiters dialog box enables you to verify that OrgPlus has correctly identified the delimiters used to denote columns in the source text file. If not, you can select the correct delimiters.
To verify that your data file is correctly delimited:
1 You can specify Delimiters manually. Choose whether to use the Tab, Comma, Semicolon or Space as delimiters or define your own delimiter using the Other checkbox and text entry area.
2 You can specify which characters are used as Text Qualifiers. Text qualifiers help OrgPlus process each field. For example a quote can be used to define the start and end of a name field (such as Smith, Nora).
3 If your text file uses an escape symbol, enter it in the Escape symbol field. An escape symbol indicates that a character should be interpreted literally (not as a delimiter or qualifier).
4 You can manually define whether the first row contains data or column headers by selecting the appropriate option:
· First row contains column names
· First row contains data
5 Verify that the data, as displayed in the dialog box's Imported Data section, has been properly delimited according to your definitions and is ready for import.
6 Click Next to continue. The Import Wizard - Data Settings dialog box is displayed.
This procedure enables you to sequence through each source field and determine which fields should be imported. You can also define the properties associated with each field.
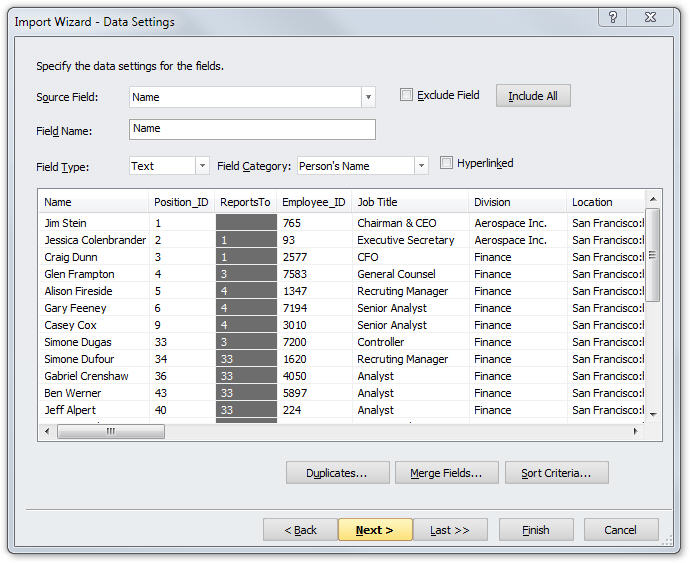
All fields from the source can be imported. The Source Field dropdown list includes all the fields defined in the source file.
To specify the kind and type of data that is in each field:
1 Optionally you can use the Merge Fields button to combine fields (such as first and last name). See Merge Fields.
2 Select each source field in turn from the Source Field dropdown list and define its settings:
· If you do not want to import a field, you can omit it by selecting Exclude Field. You can include all fields by selecting the Include All button.
· Use Field Name to rename any field.
· Use the Field Type dropdown list to select the field's type (Text, Date, Picture or Number).
· If the Field Type selection is Text or Number, you can further define the field type using the Field Category dropdown list.
· Select Hyperlinked if the field contains a hyperlink (such as an email address or a URL).
3 Click Next to continue. The Verify Hierarchy dialog box is displayed.
Note: Managing Duplicate records is discussed in Duplicates and sorting is discussed in Sort Criteria for Subordinate Boxes.