Altula
- Contact Us
- Contact Us
- 877-908-2113 (Canada)
- +44 (0) 2036 080 627 (UK)
- Sales
- Languages
In this example, you’ll learn to use enable the ‘Performance by Department’ report found in Insperity OrgPlus Premium. The Performance by Department report requires a numeric Performance data field and a Department data field.
Step 1: Open the Reports panel and open the library of predefined reports.
– From the View menu, select Reports. * Note that this feature is available only in OrgPlus Premium.
– Click the Manage Reports button.

– Click the Predefined button.
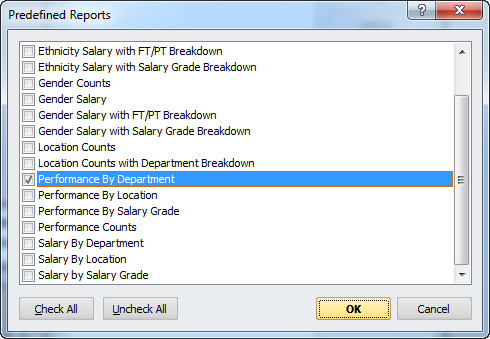
– Check the box next to ‘Performance by Department.’
– Click OK.
– Click Close to close the Manage Reports window.
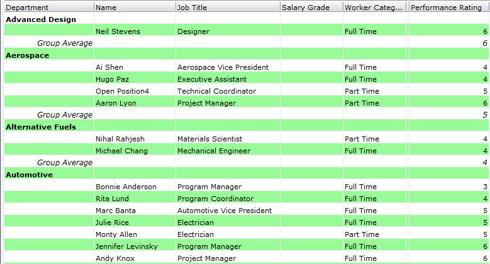
– The report appears on the Reports panel.
To customize a predefined report, follow these steps:
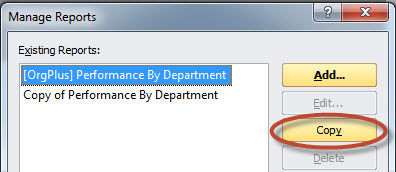
Step 1: Copy the predefined report you wish to edit.
– Click Manage Reports from the top of the Report panel.
– Select a Predefined report, and click Copy.
Step 2: Edit the copied report.
– Select the Copy and click Edit.
– Enter a new name for the report and use the various tools to add/delete fields and to adjust Sorting, Grouping, and Criteria.
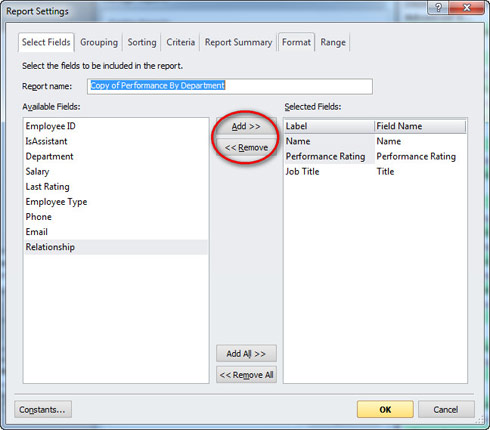
– Click OK.
– The customized report is now available on the Reports panel.
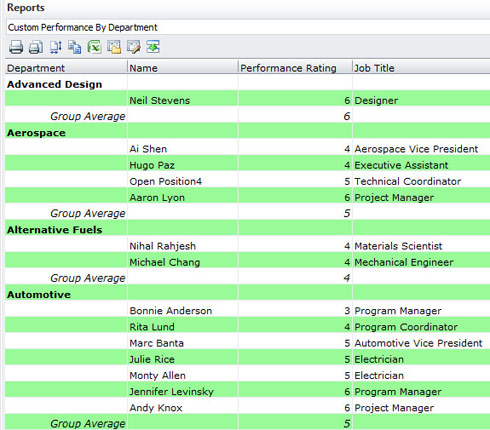
Continue to build your reports library by using additional predefined reports and creating custom reports. Reports are saved as part of your chart file and automatically update as your chart data is refreshed. Share reports with your team by printing them or sending them to Excel right from the Reports panel.