Altula
- Contact Us
- Contact Us
- 877-908-2113 (Canada)
- +44 (0) 2036 080 627 (UK)
- Sales
- Languages
In the following examples, you’ll learn to publish your chart to PowerPoint and to the OrgPlus Plug-in.
To Publish to PowerPoint:
Step 1: Open your chart file and select Publish to PowerPoint from the File > Publish to menu.
Step 2: Select options from the first screen of the PowerPoint Publishing Wizard.
– Click on an option to see a description of that option in the panel to the right.
– If your chart contains sub-charts, select the Include Navigation Arrows option: this will make the sub-chart arrows active tools when in slide show mode in PowerPoint.
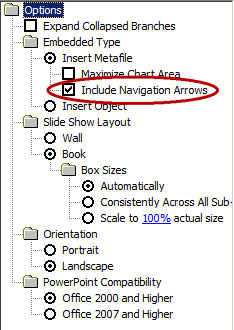
– Click Next.
– Optional: Check the Use PowerPoint Template box and browse to a PowerPoint template to apply an existing presentation template.
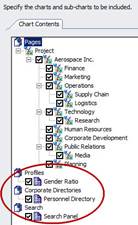
– Choose to include and format a cover page, table of contents, and/or index using the navigation tabs. The Chart Contents tab lists each of the sub-charts in the chart: un-check the box next to any sub-chart to exclude it from the published presentation.
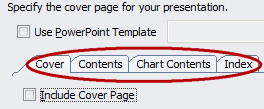
– Click Next.
– Enter a name and location for the saved file. Check the Launch PowerPoint box to see the published chart upon completion of publication.

– Click Finish.
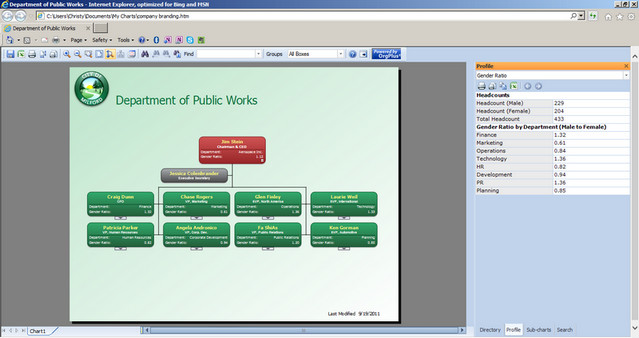
Step 3: View the file in PowerPoint.
– Note that the original OrgPlus formatting is preserved.
– Explore the options you selected in the Publisher : enter slideshow mode and use the sub-chart arrows to navigate sub-charts.
Step 4: Share the PowerPoint file with others.
– Anyone with access to PowerPoint can now view and navigate a read-only version of your chart.
Publish to the OrgPlus Plug-in
Step 1: Open your chart file and select Publish to OrgPlus Plug-in from the File > Publish to menu.
Step 2: Select options from the first screen of the OrgPlus Plug-in Publishing Wizard.
– Each option is described on the right as you click on it.
– Click Next.
– Un-check any sub-chart(s) to exclude from publication. Note that sub-chart arrows are automatically displayed in the OrgPlus Plug-in and can be used for navigation in the published file.
– Un-check any Profiles, Directories, and/or the Search Panel to exclude from publication.
– Click Next.
– Enter a name and location for the saved file. Check the Launch Browser box to see the published chart upon completion of publication.
– Click Finish.

Step 3: View the file in your browser.
– Explore the options you selected in the Publisher : note that the side panel displays any profiles and directories that you selected as well as the search tool.
Step 4: Share the OrgPlus Plug-in file with others.
– When you send the file to others, they will be prompted to install a free web browser plug-in in order to open a read-only version of the chart.
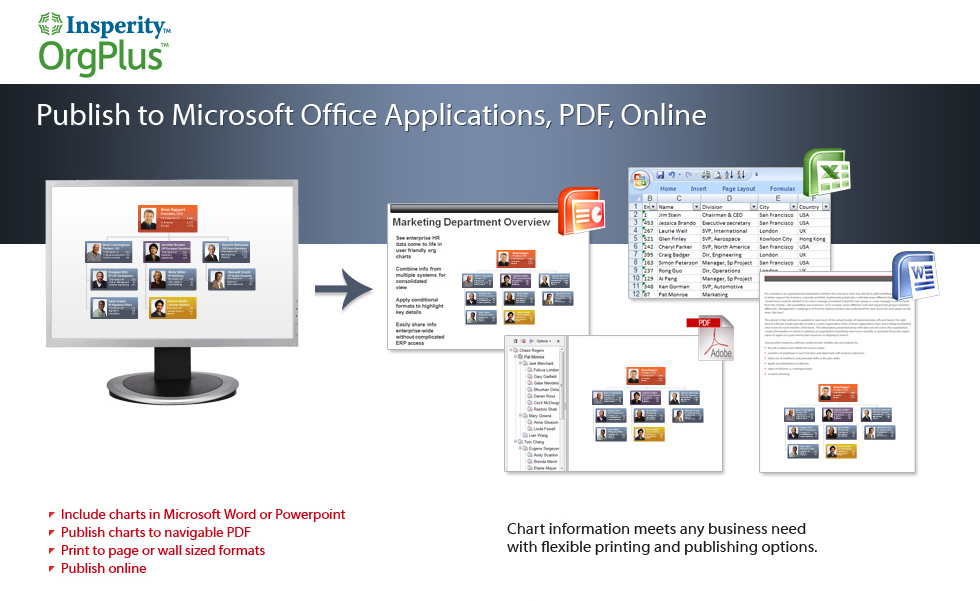
When it’s next time to share your charts, consider saving paper by converting your OrgPlus file to a PowerPoint or an OrgPlus Plug-in file. Each of these formats offers viewers a rich display of your chart with tools for easy navigation and exploration, and your file remains securely read-only. The OrgPlus Publishing Wizard walks you through the steps that make publishing effortless.