Altula
- Contact Us
- Contact Us
- 877-908-2113 (Canada)
- +44 (0) 2036 080 627 (UK)
- Sales
- Languages
In this example, you’ll learn to use the photo manager to import photos and display the
photos in chart boxes.
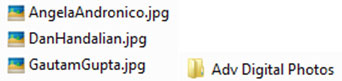
Step 1: Prepare your photos. All employee photos must be named consistently and have the same file format. Photos must be saved in a folder.
Step 2: Open the Photo Manager on the Data menu.
– On the message that opens, check the box to add the photo field to all chart boxes and then click Yes.
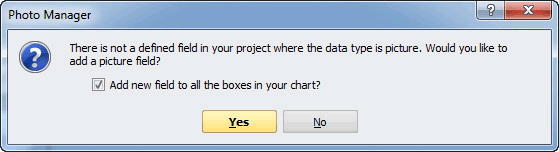
– The Photo Manager launches.
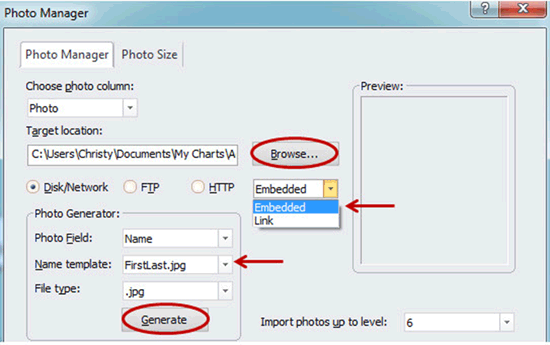
– Use the Browse button to select your photo folder.
– Choose whether your photos should be embedded in or linked to the chart file.
– Use the Photo Generator to select:
a) The photo field: this is the field OrgPlus will use to make photos to chart records and is the field used to name your photo files.
b) If using the Name field to name your photo files, select the Name template: options include Last, First, FLast, FirstL, or FirstLast.
c) Select your photo file type.
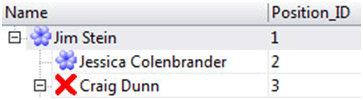
– Click the Generate button: a blue flower icon identifies records with a successful photo import while a red X identifies an unsuccessful import.
– Click OK.
– Photos now appear in your chart boxes.
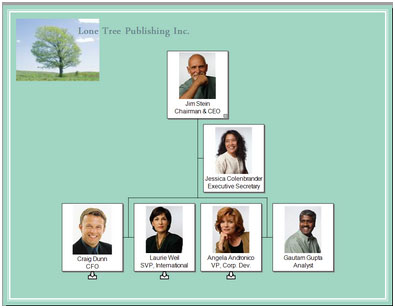
Step 3: Use the Photo Left view template to optimize your box layout.
– Open the Templates panel and select View Templates.
– Double-click the Photo Left thumbnail.
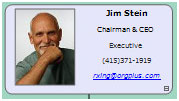
This new box layout makes each employee record look like a professional business card.